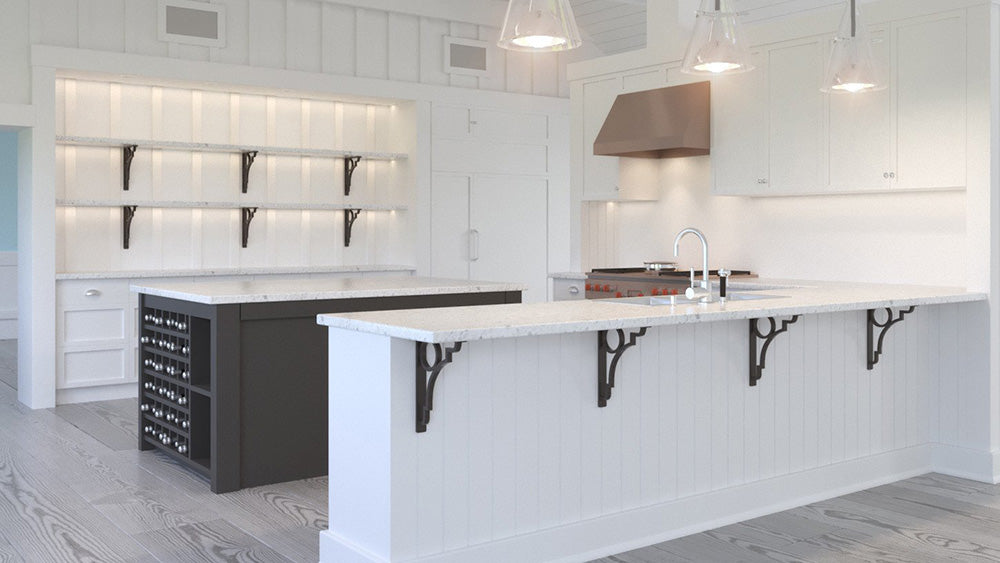
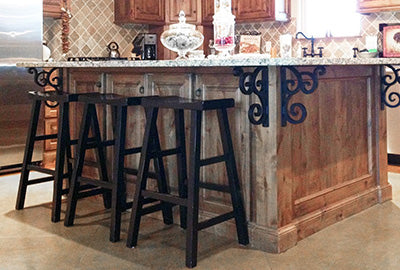
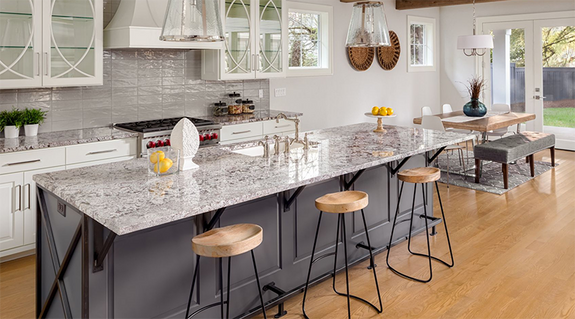
Countertop Support Brackets


Mantel Brackets


Metal Shelf Brackets


Floating Brackets


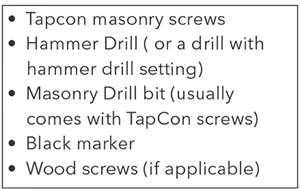
Resources

- Corbel Installation
- Shelf Bracket Installation Guide
- Standard Front Mount Countertop L Bracket Installtion
- Hidden Island Countertop Bracket Installation
- Hidden Granite Countertop L Bracket Installation
- Hidden Granite Countertop Flat Bracket
- Floating Countertop Wall Bracket Installation
- Hidden Center Mount Countertop Bracket - Knee Wall
Photo Gallery
Check out the inspiration!
How to install Iron Corbels?
To learn how to install your iron corbels please read though our corbel installation guide below.
The installation of metal corbels and brackets will differ based on the application and mounting surface. This guide helps explain the process of installing your brackets on a variety of surfaces.
Click Here to download our comprehensive corbel installation guide (PDF)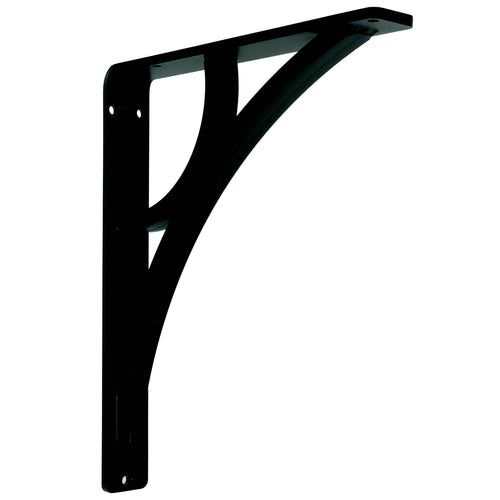
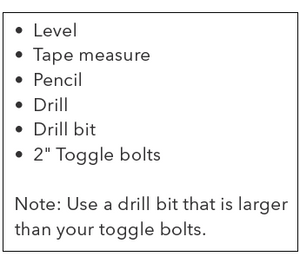
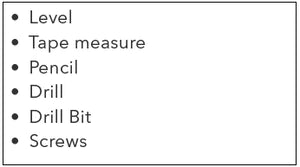
Safety Information
- Use the correct tools.
- Wear protective eye wear & proper safety equipment.
- When using tools or modifying anything follow manufactures instructions & user manuals.
- Always use common sense & follow good construction practices.
- Ask a professional when installing brackets for load bearing applications.
- Always mount brackets to a structure that is able to support the brackets and the weight that my be applied to it.
- Any use of this product in a way other than what it is intended for is not recommended.
- Shop Corbels
- Using the level, mark the height where you want the top of corbels. Make sure the line is as level as possible and then draw it equal to the length of your shelf. This way you can easily place the corbels where required. When marking the height of the corbels keep in mind that the shelf will sit on top of the corbels so account for the shelf's thickness when deciding the level of the corbel tops.
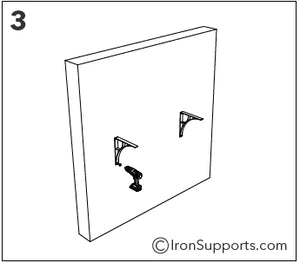
- Hold one of the corbels up to the line where it is to be installed. Keeping the corbel's top plate level with the line, mark the corbel holes with a pencil.
- Choose a drill bit that is larger than the toggle bolt that you intend to use. To determine the diameter of the toggle bolt, screw on the toggle bolt flaps and note the diameter after pinching the flaps together.
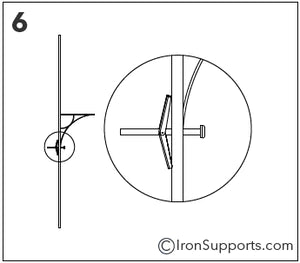
- Once you have marked the holes, drive a small nail (1.5") into each hole to check if you are going to hit a stud. In case you don't hit a stud, go ahead and use a toggle bolt for that particular hole. Note: if you do hit a stud, use a regular screw instead with the same head design as the toggle bolt.
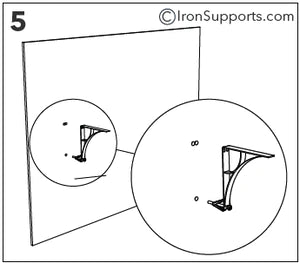
- For the hole where the nail doesn't hit any studs, drill the hole into the drywall. Now pass the toggle bolt into the corbel hole. Once it's through the corbel hole, screw the flap on the edge of the toggle bolt and leave only a few threads on the bolt's end.
- Push the toggle bolt through the drywall hole. Once the bolt passes through to the other side and the flaps open up, push the corbel directly against the wall and hand tighten the bolt as much as possible. Next, use a drill or screwdriver to completely tighten it.
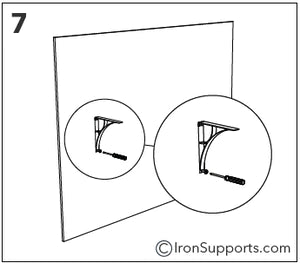
- Tighten any regular screws that you may have used in the installation.
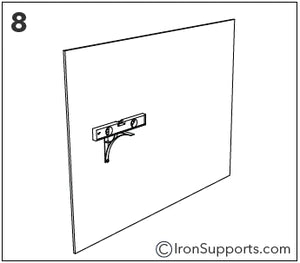
- Use a level to ensure the brackets are level. If necessary, use shims to make the bracket level.

- Decide where your going to be putting these corbels and hold one in place.
- Now, using a pencil/black sharpie, mark the positions of the screw holes on the wood. Make sure you get a mark corresponding to the middle of each hole.
- Choose appropriate screws to mount the corbel according to the size of the screw holes.
- Choose a drill bit that's slightly smaller than your screw and drill holes into the wood.
- Mount the Corbel using the screws.
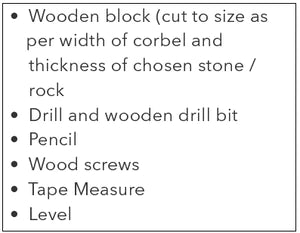
Installing corbels over a stone surface is the most complicated of corbel installations. Such a situation is encountered when you need support for a mantle or a counter top. It is recommended that you get professional help for this job. Please keep the following tips in mind when undertaking such a project:
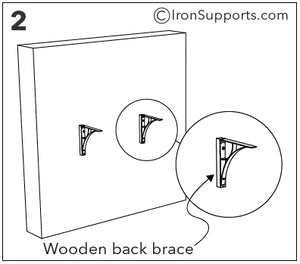
Always remember that the corbels have to be installed on a flat surface. This means that the corbels will need to be installed before you lay the rock / stone on the fireplace / bar area. To create a solid flat surface, cut up a wooden block to create as a back block. This back block will be mounted before the stone work. The stone will need to be laid around the corbel once installed.
- When cutting your wooden block, ensure the width matches the width of the corbel and the thickness matches the thickness of the stone / rock. By doing this, the finished product shows the stone and the wooden back brace are sitting level.
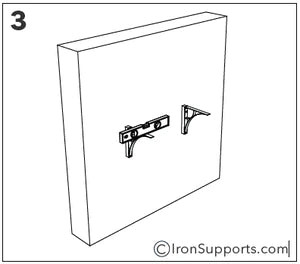
- Once the back-braces are in place, you can screw on the corbels by following the instructions on Page 2 for wooden surfaces.
- Use a level to ensure the brackets are level. If necessary, use shims to make the bracket level.
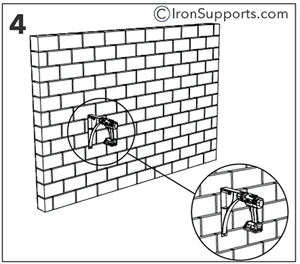

- Determine the position and height of the Corbels. Using a black sharpie, mark the spots where the corbel holes match up on the brick wall.
- Choose the appropriately sized masonry drill bit that is suitable for your tapcon screws. In most cases, tapcon screws come with a drill bit. It is recommended to use the accompanying bit wherever possible.
- When drilling the holes into the brick, make sure you drill a very straight bore.
- Drill the top two holes first and slightly angle the drill from the outside in. The hole should be as deep as the screw for a secure fit.
- You may want to get assistance when mounting the corbel and screwing in the Tapcon screw. Be careful to screw it in slowly so that you don't strip out the hole once the screw is tight. Should this happen, you'll want to move the corbel to a different position to install it.
- Use a level to ensure the brackets are level. If necessary, use shims to make the bracket level.

Join Our Mailing List
Shopping Cart
×Taxes and shipping calculated at checkout
Exact shipping dates and delivery date estimates are calculated on the next page based on your delivery address.
Your cart is empty.